"I, too, made a pinhole camera from an oatmeal box."
| Oatmeal Box Pinhole Photography This site goes through every step required to build and use an oatmeal box pinhole camera and then the procedures for processing and printing the photographs. It is illustrated with photos of children completing the steps and has a gallery of pinhole photographs. |
| The Penultimate Pinhole Photography Site This is the ultimate resource for pinhole photography. It also includes a gallery of pinhole photographs. |
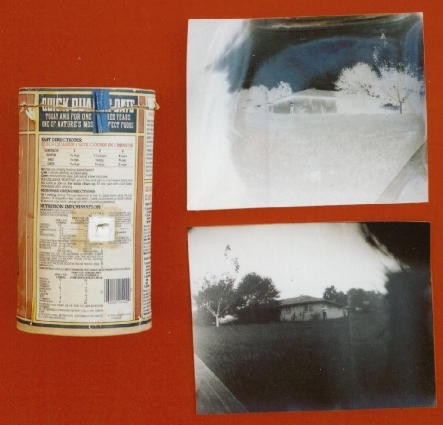
| This photograph shows the pinhole camera, the 'paper' negative that was exposed in the camera, and the positive print that was contact printed from the negative. Resin coated paper can be used for contact printing but normal fiber paper cannot. The pinhole 'lens' is the small square of aluminum foil taped near the center of the box. I made the pinhole by carefully piercing the foil with a sewing needle. I wanted the diameter of the hole to be about 0.1 mm. |
 The image on the left shows the full 8x10 sheet of paper exposed in the camera. It was scanned from the negative print. I then used photo software to reverse the image and change it from negative to positive.
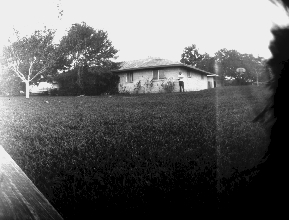
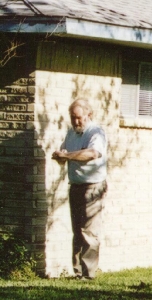
 The positive print that I made is not as sharp as the negative. Even the resin coated paper is not as good as film for contact printing. The color print was made many years later to show how the pinhole camera was placed. Its position on a bench resulted in the low angle view. I probably placed a rock or other weight on the oatmeal box to keep it still during the long exposure. I covered the pinhole with a piece of black electrical tape which served as a shutter then placed the paper in the box in the darkroom.
 | Both of the images were cropped and enlarged to give a better comparison. I listed the lighting conditions for the pinhole photo as 'cloudy bright.' The 35mm photo was made on a late afternoon in fall with the sun low in the southwest. The harsh shadows make comparison difficult and the pinhole camera is almost lost in the shade of the trees. The 'wide-angle' perspective of the pinhole photo is the result of the closer placement of the pinhole camera and not because of the relative difference in the focal lengths of the two lenses. (I suppose the pinhole shouldn't be referred to as a lens.) Focal length and film size affect the included angle of the view but not the perspective of the view. |
|
|
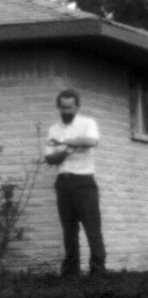
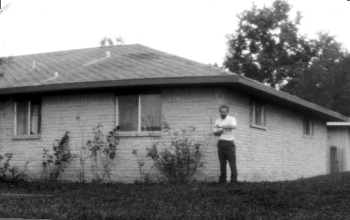
 I next cropped the photo to make a full-length image of myself from each of the photos to provide a better comparison of the image quality of the 35mm versus the pinhole.
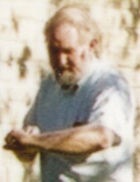
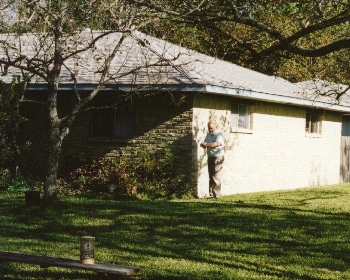
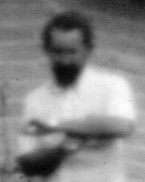 Finally I cropped the images down to show only my upper torso for a comparison of the images at the highest practical enlargement. While evaluating the relative quality, remember that I stood there for 6 minutes while making the pinhole photo and it is possible that I moved slightly during that time thus causing some blur from the motion.
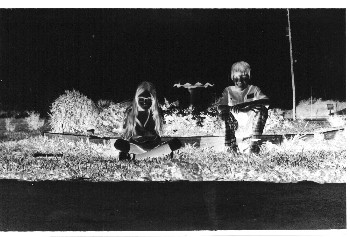

|
THIS PAGE - Pinhole Photography - An old pinhole photograph is compared to a modern 35mm photo of the re-created scene with an explanation of the process for making a large-format pinhole photograph using photo enlarging paper. ANOTHER PAGE - Photographic Perspective - Our experience with photography gives us the impression that the focal length of the lens will create a particular perspective in the resulting photograph. However, the photos shown here illustrate that it is camera-to-subject distance, not lens focal length that makes the difference. Stereo Photography - A stereo photo pair is displayed with instruction for viewing in 3-D by the "cross-eyed" technique. There is also a brief account of my experience with stereo photo systems and links to several excellent and comprehensive sites on stereo photography. Film Resolution - A portrait of a young woman and enlargements of her eyes demonstrate the degree of resolution I was able to obtain with B&W 35mm film. Bridal Portrait - A portrait of a young bride and enlargements of her eyes demonstrate the degree of resolution achieved with 35mm colorprint film. |
| SITE INDEX |
| VIEW OR SIGN MY GUESTBOOK |